Before you start
Have an eligible WhatsApp sender already configured in the Twilio account you intend to connect. You need permission to manage that account and the credentials Kibi requests. Connecting an existing sender is different from moving a number between providers; review any migration separately before changing a live number.
Connect it, step by step
- Sign in to the official Twilio Console. Locate the Account SID and requested authentication token for the account that owns the sender.
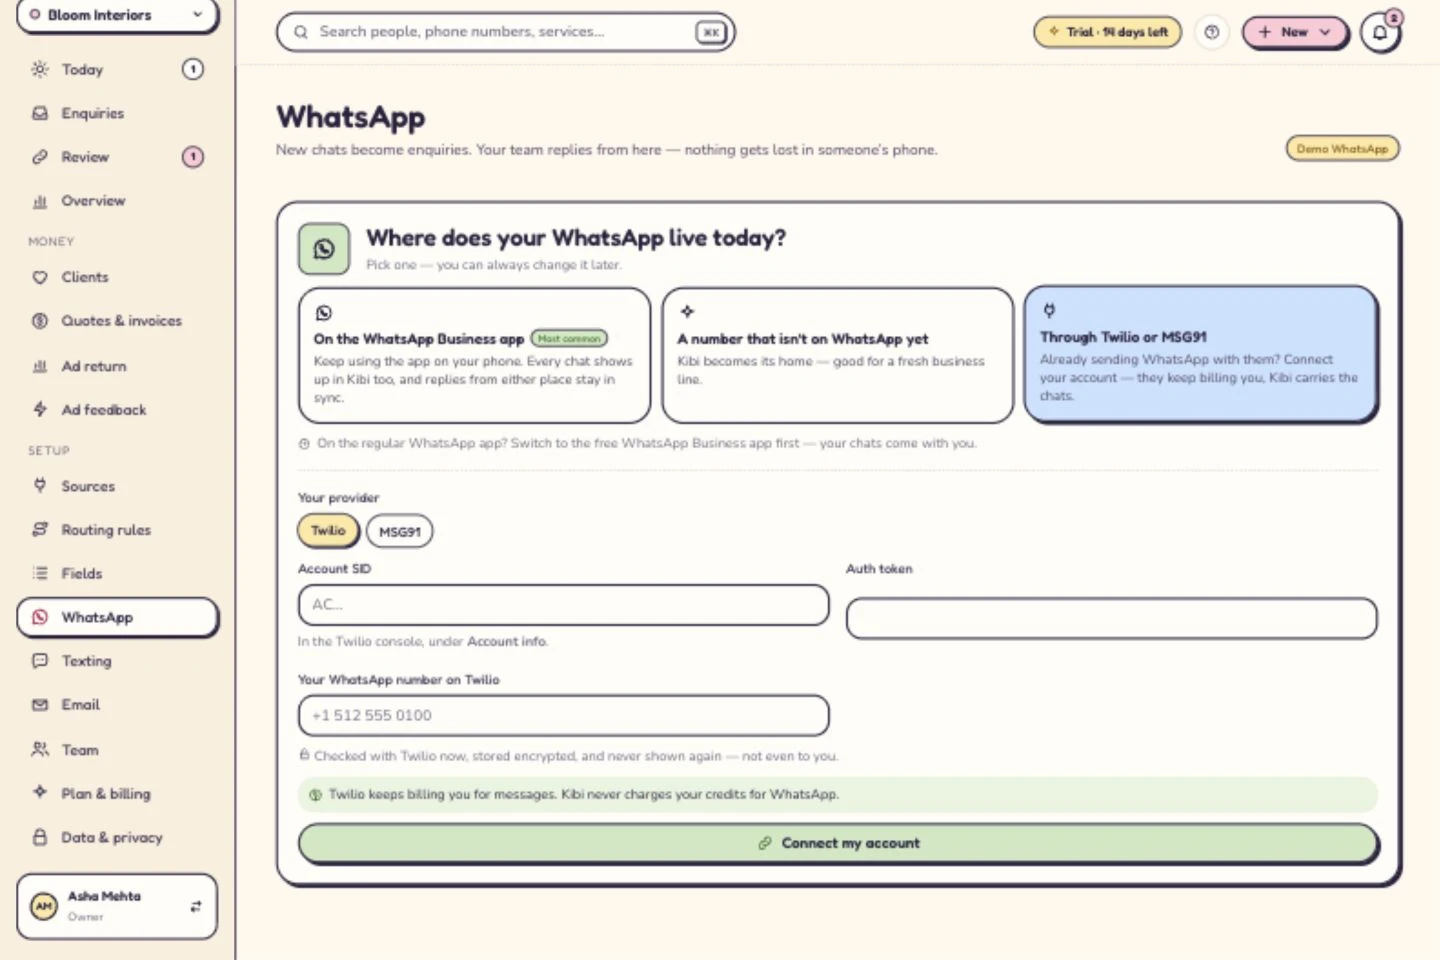
- In Kibi's WhatsApp page, select ‘Through Twilio or MSG91’, then Twilio.
- Enter the requested details into their matching fields in Kibi's authorised connection form. Enter the sender number with its country code.
- Select ‘Connect my account’ and review the result. Correct the reported mismatch rather than repeatedly submitting different credentials.
- Send a test message to the connected sender. Confirm it appears in the intended Kibi enquiry, then test a permitted reply.
Twilio keeps billing you for messages. Kibi never charges your credits for WhatsApp.
What happens next
Twilio bills your business directly for messages. Kibi never charges your credits for WhatsApp. Review Twilio's current pricing and sending requirements. Where the supported connection offers template Sync, use it to refresh the templates available in Kibi.
If you get stuck
Authentication rejected? Check that the account, credential and sender belong together. Inbound message missing? Review sender readiness and the connection's inbound configuration. Token changed? Update the authorised Kibi connection and test again. Never paste tokens into a support ticket, screenshot, email or chat.
Related guides
Kibi screens shown here use a demonstration workspace. Use your own account details when you connect.